

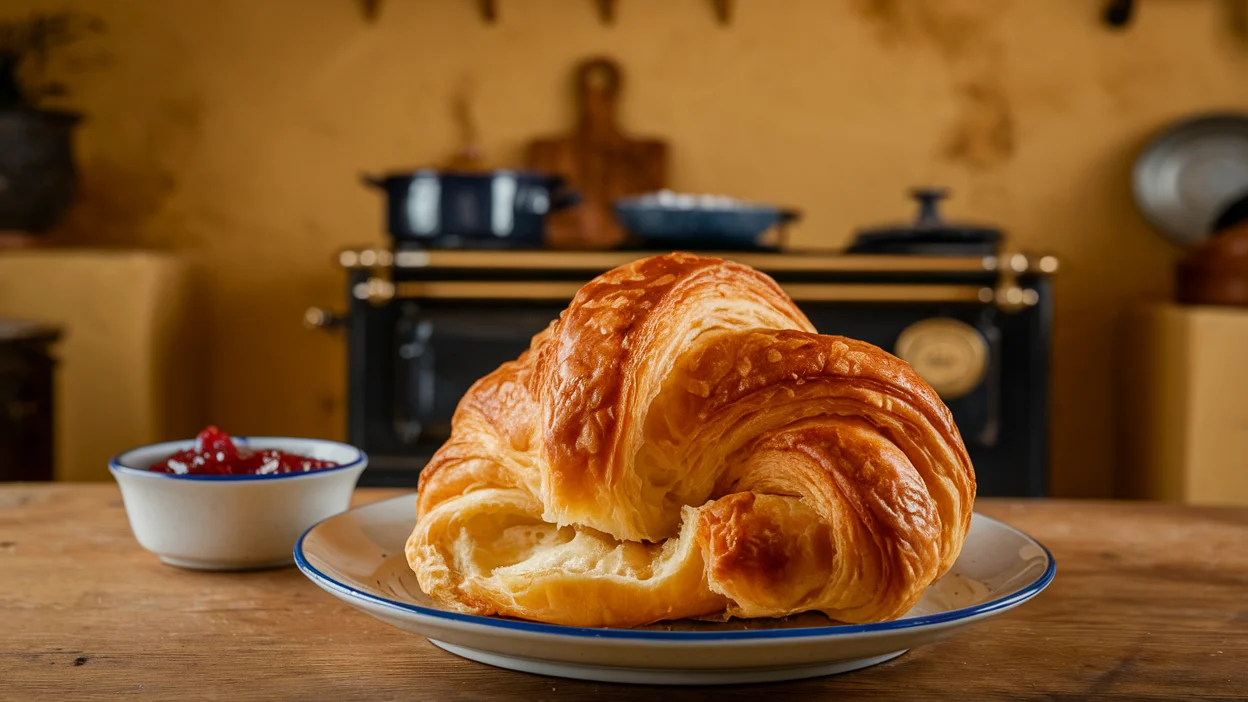
There’s something undeniably magical about biting into a warm, buttery French croissant. The golden, flaky layers practically melt in your mouth, releasing a symphony of flavors that evoke images of cozy cafés along the Seine. Whether you’re enjoying one with your morning coffee or pairing it with a rich chocolate filling, a perfect croissant transcends the ordinary and becomes a moment of indulgence.
But what if you could bring this moment of joy into your own kitchen? Imagine the satisfaction of pulling freshly baked, crisp croissants from your oven, knowing that you’ve crafted them from scratch. If this sounds like the ultimate baking challenge, you’re in the right place. In this article, we’ll guide you through every step of the French croissant recipe — from the ingredients to the perfect lamination technique — so you can create flaky, buttery perfection at home.
Table of Contents
The Essential French Croissant Recipe: Your Step-by-Step Guide
Making croissants at home requires a bit of patience and precision, but with the right ingredients and techniques, you’ll be rewarded with the most delicious, bakery-worthy results. Follow this comprehensive guide to master the process and bring a touch of France to your kitchen.
What Makes a French Croissant Unique?
A French croissant is not just a pastry; it’s a work of culinary art. So what sets it apart from other baked goods? The answer lies in its distinctive texture and buttery flavor, both of which are achieved through the process of lamination.
- Lamination: This is the technique of folding butter into dough multiple times to create thin layers. Each fold results in a light, flaky texture that’s characteristic of croissants. As the croissants bake, the layers separate, creating that delightful crispness that you’re probably imagining right now.
- Butter: Unlike many pastries that rely on oils or shortening, the French croissant uses copious amounts of butter, which is essential for achieving that perfect richness and flakiness. The best croissants use French-style butter, which has a higher fat content and a more complex flavor profile than standard butter.
- Time and Patience: The process of creating croissants from scratch can take several hours, but don’t let that intimidate you. Much of the time is passive, allowing the dough to rest and rise at intervals. Patience during the folding and resting steps is essential for achieving the perfect croissant.
Key Ingredients for a Classic French Croissant
You can’t create a perfect French croissant without the right ingredients. Each component plays an important role in achieving the signature texture and flavor. Here’s a breakdown of the ingredients you’ll need:
Table: Ingredients for French Croissant Recipe
| Ingredient | Amount | Notes |
| Bread Flour | 500g | High-protein flour for structure and rise. |
| Butter (unsalted) | 300g | Use cold, high-quality butter for the best texture and flavor. |
| Active Dry Yeast | 10g | Make sure the yeast is fresh for optimal rise. |
| Sugar | 60g | Adds just a hint of sweetness to balance the buttery flavor. |
| Salt | 10g | Enhances the flavor of the dough and helps balance the sweetness. |
| Whole Milk | 100ml | Adds richness to the dough. |
| Water | 200ml | Hydrates the dough, helping it come together. |
How to Make the Dough for French Croissants
Creating the perfect dough is the first step to croissant perfection. The dough itself is a relatively simple mixture, but the key is to knead it just right and give it time to rest and rise.
Step-by-Step Instructions:
- Mixing the Dough:
- In a large mixing bowl, combine 500g of bread flour, 60g of sugar, 10g of salt, and 10g of active dry yeast. Stir in 200ml of water and 100ml of whole milk.
- Knead the dough by hand or with a stand mixer until it becomes smooth, elastic, and slightly tacky — this should take about 10 minutes. If you’re kneading by hand, take your time to develop the gluten.
- First Rise:
- Cover the dough with a clean kitchen towel and place it in a warm area to rise for about 1-2 hours, or until it has doubled in size. The dough needs to ferment slowly for the best texture.
- Chill the Dough:
- After the dough has risen, gently punch it down to release the air, shape it into a ball, wrap it tightly in plastic wrap, and place it in the refrigerator for at least 30 minutes. This step will help the dough stay cool during the lamination process.
Mastering the Lamination Technique: Folding Butter into Dough
Lamination is the secret to a croissant’s airy, flaky texture. It’s a process of repeatedly folding butter into the dough to form thin layers. While it sounds complicated, with patience, you’ll be able to achieve perfect results.
Preparing the Butter Block:
- Shape the Butter:
- Start by cutting 300g of unsalted butter into small slabs. Place these slabs between two sheets of parchment paper and use a rolling pin to flatten it into a square about 7-8 inches wide. Refrigerate this butter block while you prepare the dough.
Folding Process:
- Rolling the Dough:
- Roll out your dough into a large rectangle, about twice the size of your butter block. Position the butter in the center of the dough, then fold the dough over the butter, ensuring it is fully enclosed.
- First Fold:
- Roll the dough into a long rectangle and fold the dough into thirds like a letter. This is the first “turn.” Fold it tightly and refrigerate for 30 minutes to chill.
- Repeat:
- Remove the dough from the fridge and roll it out again to begin the lamination process. Perform two more turns, chilling the dough between each turn. You should end up with a dough that has at least 27 layers of butter and dough.
Shaping Your Croissants
Once the dough has been laminated and chilled, it’s time to shape the croissants. The goal here is to create perfectly rolled croissants that will bake into light, airy pastries.
How to Shape Your Croissants:
- Roll Out the Dough:
- Roll the dough out into a long rectangle, about 1/4 inch in thickness. The thinner, the better.
- Cutting the Triangles:
- Using a sharp knife or pizza cutter, cut the dough into long triangles (about 5 inches wide at the base).
- Shaping the Croissants:
- Starting from the wide end of each triangle, roll the dough tightly towards the point. Gently curve the ends to create the traditional crescent shape.
- Proofing:
- Arrange the shaped croissants on a baking sheet lined with parchment paper. Cover them with a kitchen towel and let them proof for 1-2 hours, or until they have doubled in size.
Baking the Croissants to Golden Perfection
Baking your croissants is the final step. This is when all the hard work pays off and you get to enjoy the crispy, buttery layers you’ve worked so hard to create.
How to Bake:
- Preheat the Oven:
- Preheat your oven to 400°F (200°C). Make sure it’s fully heated before you put the croissants in.
- Egg Wash:
- Brush the proofed croissants with an egg wash (a mixture of beaten egg and a little water) to achieve that golden, glossy finish.
- Bake:
- Bake for 15-20 minutes, or until the croissants are puffed and golden brown. For optimal results, turn the pan halfway through the baking process.
- Cooling:
- Let the croissants cool for a few minutes on a wire rack before serving. The layers should be light and crispy, and the interior soft and buttery.
Tips for Perfect French Croissants Every Time
While making croissants from scratch can be tricky, these tips will ensure you get flawless results every time:
- Keep the Butter Cold: Cold butter is essential for creating the flaky layers. If your butter melts during the folding process, it won’t create the layers you need.
- Don’t Rush the Proofing: Give your croissants enough time to rise. If they don’t proof enough, they won’t puff up properly when baked.
- Use the Right Flour: Bread flour is best for croissants because of its higher protein content, which helps develop the dough’s structure.
Common Croissant Baking Mistakes and How to Fix Them
Even experienced bakers make mistakes, but knowing what went wrong can help you fix the problem and perfect your technique.
Common Issues:
- Croissants Not Rising: Check the freshness of your yeast and make sure your dough is proofing in a warm, draft-free place.
- Croissants Are Flat: Ensure you’re folding the dough properly and giving it enough resting time between turns.
- Croissants Too Greasy: This usually means the butter was too warm or the dough was overworked. Ensure the dough and butter remain cold throughout the lamination process.
FAQ: French Croissant Recipe
Q1: Can I make French croissants without a stand mixer?
A: Absolutely! While a stand mixer makes the kneading process easier, you can mix and knead the dough by hand. It just takes a little more effort.
Q2: How long does it take to make French croissants from start to finish?
A: From start to finish, it usually takes about 4-6 hours, depending on the resting and proofing times. However, much of this time is passive.
Q3: Can I freeze croissant dough?
A: Yes! After laminating the dough, you can freeze it. Simply let the dough thaw overnight in the fridge before shaping and baking.
Q4: Why are my croissants dense instead of flaky?
A: This could be due to under-laminating the dough or using butter that was too warm. Be sure to follow the lamination steps carefully, and keep your butter cold.
Q5: Can I use a different type of flour for croissants?
A: Bread flour is ideal for croissants because of its higher protein content. However, if necessary, you can substitute all-purpose flour, but the texture may be slightly different.
Conclusion: Enjoy Your Homemade French Croissants!
There you have it – your ultimate guide to making French croissants at home. While it takes some effort and time, the results are worth it. Whether you’re sharing your homemade croissants with friends over brunch or enjoying them solo with a cup of coffee, each bite will remind you of the beauty of French pastry craftsmanship.
So, what are you waiting for? Grab your apron, gather your ingredients, and get baking. You’ll soon be savoring the taste of Paris in your own kitchen!